I’ve shared my quilling experience in a previous post.
Earlier this year, I got my hands on this wonderful form of art. I was so lucky to have gotten my first lesson from Ms. Motoko Maggie Nakatani, a renowned quilling artist, as I followed the Silver Quilling training at Art Clay headquarter in Tokyo.
Another name for quilling is ‘paper filigree’, pretty obvious as its look resembles the traditional filigree work. Instead of using metal wire or sheets, in quilling we use narrow strips of regular paper. By rolling a strip into a coil and further modify the shape by pressing with fingers, we can make an element. An arrangement of more elements can form a simple to intricate pattern to create objects like jewelry and mini figures, as well as to adorn surfaces on items such as boxes and frames.
There was not clear information on when exactly the art of quilling started. However, some of the earliest quilling work was made during the Renaissance period. Using the leftover of gilded paper of books, the nuns and monks in monasteries in Italy and France created quilling art which adorned books and religious items of sacred art pieces.
Then, in the 18th century, quilling became the activity of the royal and higher class ladies. The range of works varied from a small tea caddy to a large cabinet. Different objects were even designed especially to be used as the base of quilling, for example, a wooden container with decreased surfaces. Quilling art can appear on its own, or combined with another form of art such as embroidery work.
The term quilling came from the word ‘quill’. As they said, in the past people used the tip of a quill to roll the paper strips. Nowadays, the slotted quilling tool and other quilling supplies are widely available for fairly economical prices. Quilling is very relaxing to do. With limitless design possibilities and charming appearance, it’s not a wonder quilling is such a popular activity among many.
To start quilling, you only need a few tools.
Beside the quilling paper – readily available in different width (2.5 mm is what I’ve been using), you need a slotted quilling tool, tweezers and scissors. There are the additional tools to make quilling easier and more fun, such as different templates, designing boards, and paper crimpers.
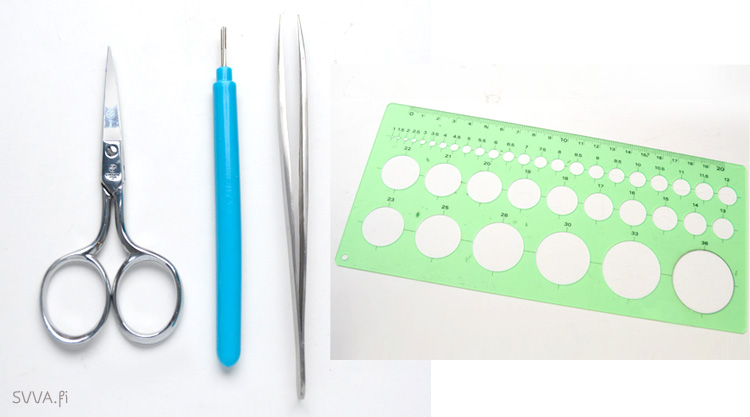 The basic tools for quilling: a pair of scissors, slotted quilling tool and tweezers. Circle template is handy to make consistent size of quilling elements.
At first sight, a quilling work could look so complicated, and it’s difficult to figure out how to start. However, as I mentioned earlier, a quilling work consists of more quilling elements. Some of the most popular basic shapes are: Tight Circle, Loose circle, Teardrop, Marquise, Open heart, V-scroll
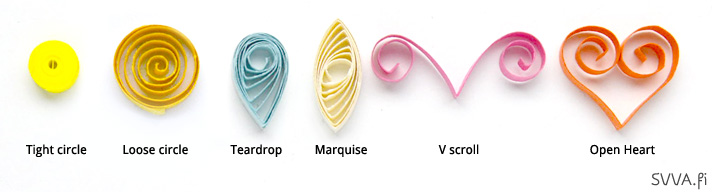
Some of the most popular basic shapes of quilling elements.
It’s quite simple to quill. Here I show you how to create an open heart. First, fold a paper strip into two. Then, insert one end of the strip to the slotted tool, quill, take it off and do the same to the other end. Voila! You’ve quilled a heart shape. You can create exciting composition by combining several elements, even from just one shape like this.
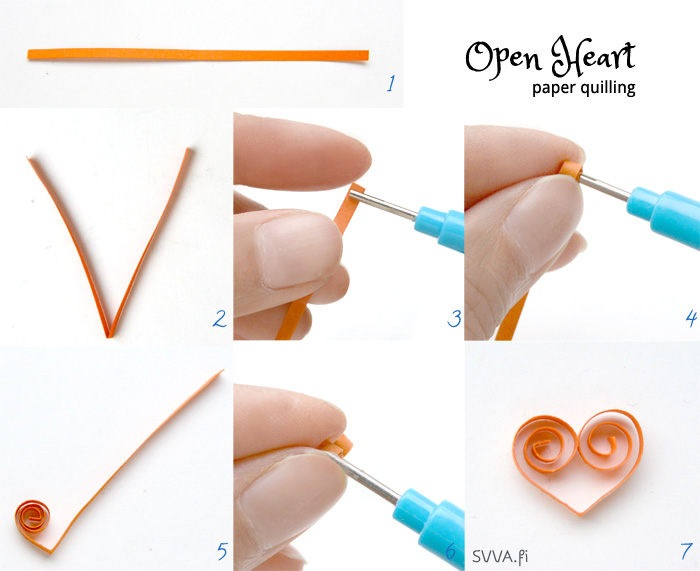
Simple steps to create an open-heart paper quilling element.
Move on from paper quilling to Art Clay Silver Quilling.
For you who’s not familiar with Silver Clay, I need to explain that here, ‘silver’ is not just silver colored paper, but real fine silver metal. I know, exciting, right? Read here to know more about silver clay.
Art Clay Silver had already paper clay type for some time, but this year Art Clay released the Long version of the paper clay. With this 20x4cm rectangular shape, we can cut the paper clay into long thin strips which are perfect for quilling.
The beginning steps of Silver Quilling are similar to regular paper quilling. After cutting the silver clay paper into ready to use strips of 2-3mm width, we can quill different shapes of elements. The differences of the next steps are pretty much determined by the different nature of the materials. The Art Clay Silver Quilling Certification program focuses on the specific techniques to create Silver Qulling work, also in combination with regular silver clay.
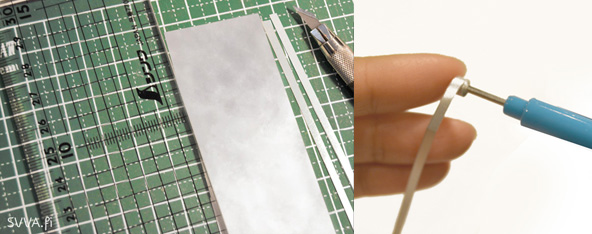
Create silver clay strips by cutting the paper clay with craft knife. Each strip could be quilled using a slotted quilling tool.
The firing of Art Clay Silver Paper quilled elements takes place in a kiln, from room temperature to 800°C, then hold for 30 minutes. Fired and cooled off pieces can then be joined with Art Clay Silver Paste New Type. Using the new paste type is required, as it’s specially formulated to join fired pieces too. After firing according to the regular Art Clay Silver firing schedule, the pieces can be polished. The fastest and perhaps best way to polish such intricate and delicate pieces is using a magnetic tumbler.
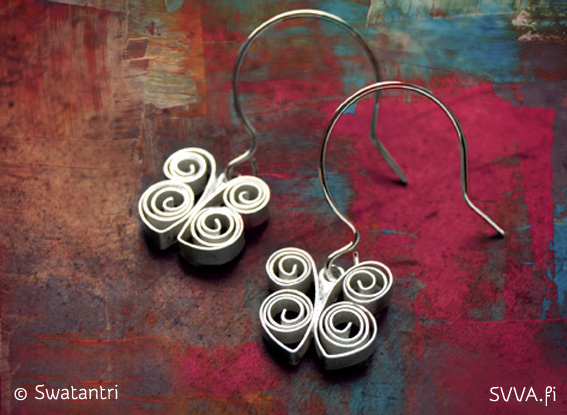
Each of these sweet butterfly earrings is made by combining two open-heart elements.
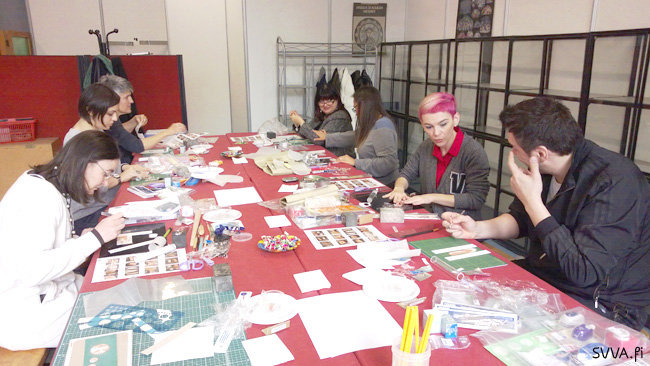
This autumn, in October, I had a fabulous time sharing Silver Quilling.
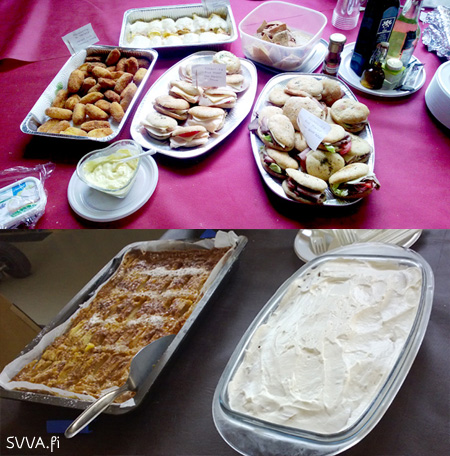
I was fortunate to teach a 3-day certification program at Hobbyland, Milan, Italy. The group was so dynamic and fun, with talented students not just in jewelry making but other art forms too! Every day was wonderful. I really enjoyed teaching there, and I have to say I felt so pampered with freshly made Italian food every the lunch time. On the last day, a student even brought a special homemade tiramisu for everyone. Amazing dishes, desserts and exciting chats every day! I’m very grateful, it was super and I hope to meet everyone again one day.
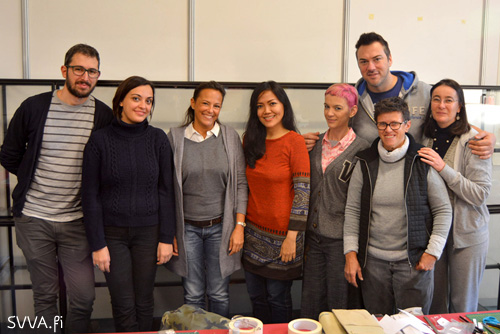
The Silver Quilling team.
A glimpse of lunch. I still think of it!
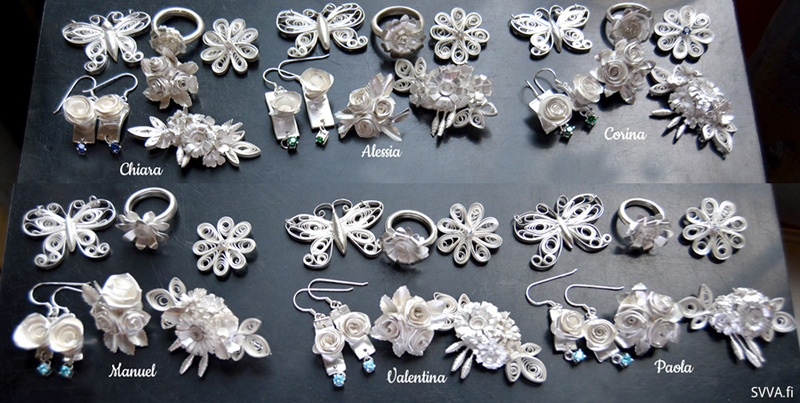
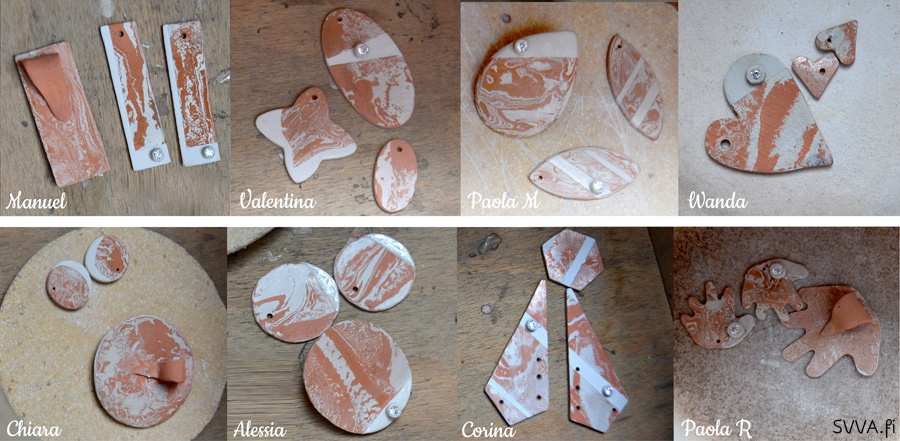
Fantastic results by all students.
The day before the Silver Quilling Certification, I also gave a one day New Mokume Gane workshop. Read here for more info on New Mokume Gane.
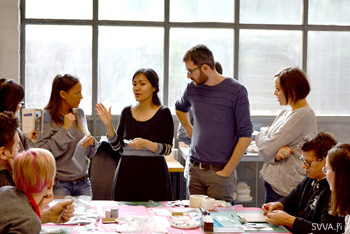
In action: New Mokume Gane.
New Mokume Gane jewelry. Firing took long time, the pieces here are still unfired.
Hope you enjoy this post!
Leave a Reply