Right after my summer break, I got the opportunity to try out Art Clay Silver 950.
I looked forward to trying the final version of this silver and copper alloy clay. If you’d like to know about silver clay, you can read about it on one of my previous posts here.
You might be familiar with the term Sterling Silver 925 jewelry, which means the piece has a minimum of 92.5% silver and the rest is another metal, usually copper. The addition of copper is to add strength to silver. After properly fired, ACS 950 contains 95% silver and the rest is copper.
The first impression, ACS 950 was slightly darker than regular Art Clay Silver (ACS), but it felt just like regular ACS: soft and wasn’t sticky.

ACS 950 is slightly darker, ‘reddish’, than regular ACS.
If fired accordingly, this clay is being said to be 60% stronger than regular ACS. With that character, I thought what to create with 25 gram of the clay.
So I decided to make delicate and open shapes.
During my recent trip, I saw lots of orchids, and I always love the look of orchids on its stem. Inspired by Star Orchid with its slim and pointy petals, I planned for a pendant and earrings. I only have this rather blurry picture of a type of star orchid plant, but there you can see the shape and stem. It’s perfect as I wanted to try a project with open design and thin parts.
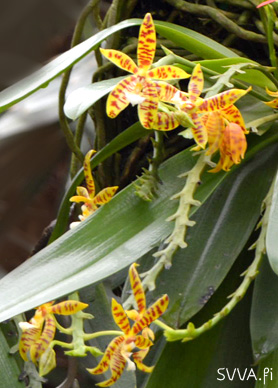
A type of Star Orchid. My inspiration for the pendant.
As I started to make parts of the pendant, I noticed how ACS 950 was very easy to work with. It was soft, but it kept the shape once formed and took details very nicely. In fact, if I didn’t know, I wouldn’t notice whether I was working with regular ACS or ACS 950.
As you can see below, I intentionally made all the little branches using the clay itself. Each branch is about 1-1.5mm in diameter. Normally, in this type of form I would use pieces of wire or otherwise, design a different form.
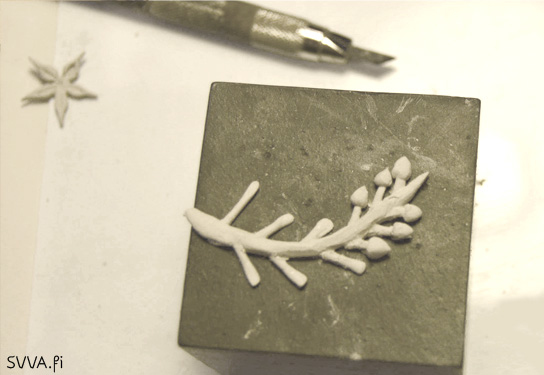
The ‘stem’, the structure of the orchid pendant.
After the stem was ready, I hand-shaped each flower. These flowers are tiny, ranging from 8-12mm. As I hand formed each of them, there were cracks in some points. I could fix cracks easily using the paste that I made by adding a tiny bit of water to a piece of clay and mashed it with a spatula.
I then attached the flowers to the stem, using ACS paste. After the piece was assembled, I also made and added bails on the back of the pendant, using the same clay. Somehow, I got a feeling that on dry stage the ACS 950 was stronger than regular ACS.
After drying, prefinishing was a breeze. Whatever ACS prefinishing technique works well with ACS 950. I like to use a craft knife to trim slightly moistened clay, and this worked beautifully.
I fired the ready piece according to the instruction: from room temperature to 500°C then held for 30 minutes, and then ramped up to 870°C and held for 1 hour, then let it cool off until 200°C before taking it out.
The result?
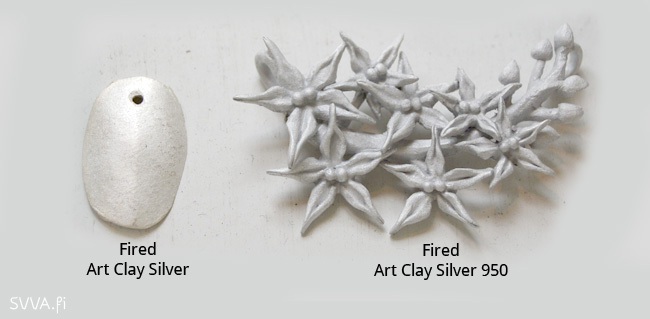
Fired ACS 950 is greyish, compared to regular ACS.
First of all, ACS 950 looked grey, compared to ACS. More importantly, the piece was very hard. I tried to ‘push’ a branch or a petal by fingers and then using the pliers, but I couldn’t do it. Even those thin branches. This is wonderful as now I can create even thinner, more open and delicate work without, for example, the need of support wire in the construction.
Polishing was just as usual. I brushed the piece using steel brushes and burnished with agate burnisher, and then put it into the tumbler.

After polishing, lovely shiny silver.
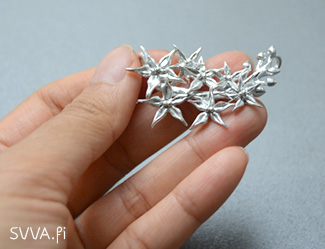
The pendant contains lots of tiny parts.

Worn to show scale.
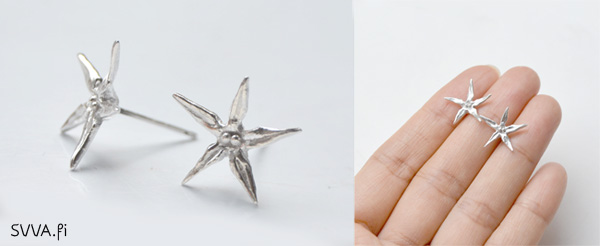
Continuing the theme of Star Orchid, I also made a couple of tiny flowers for earrings.
These two flowers had even narrower petals. I planned to use a pair of silver 925 ear studs, so I made attachment holes on the back of the flowers.
After firing the flowers in the recommended ACS 950 firing temperature, I then attached a pair of ready made silver 925 ear studs using Art Clay Silver Paste. I had only slightly diluted Art Clay Paste left, so I used that. After drying, I fired the earrings at 700°C for 15 minutes.
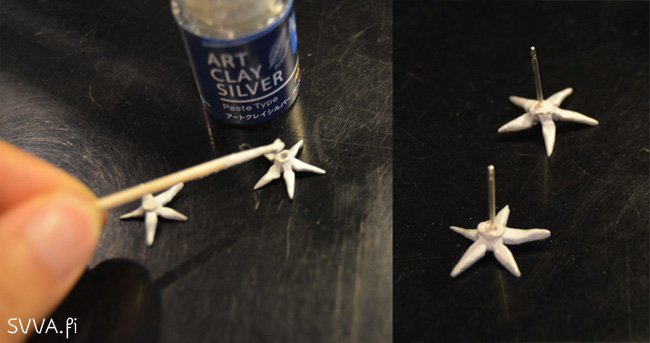
I attached the sterling silver earstuds on the fired ACS 950 using regular AC paste.
After firing, I checked whether the ear studs stayed put, but discovered one was a bit wobbly. I thought this was because I used diluted ACS Paste, so after drying there was space between the clay and the ear stud.
I removed both ear studs using pliers (it was quite hard to pull them off) and reattached using ACS paste, this time, I made sure I used the original consistency and then refired.
After firing, the ear studs stayed put. Despite being delicate and tiny, the earrings were very solid.
My ‘Star Orchid’ earrings.
Along with the pendant and the earrings, I made an open ring.
To see how well the clay worked with texture, I rolled it on a texture plate between 1mm plastic strips. The clay took textures perfectly. Earlier, I measured the circumference of my finger with a strip of paper and then added 12% to the length, so I cut the ring band accordingly.
I wrapped the band around the mandrel and continued working as usual. One thing I noted, prefinishing an open ring like this was a bit tricky, as it tended to move easily, so I put extra care to prefinish this one.
After firing and finishing, the ring felt solid and strong. I wore it continuously to test (including doing different house chores) and it wasn’t scratched or dented. As you can notice from the picture, polishing to a high shine is no problemo. Lovely!
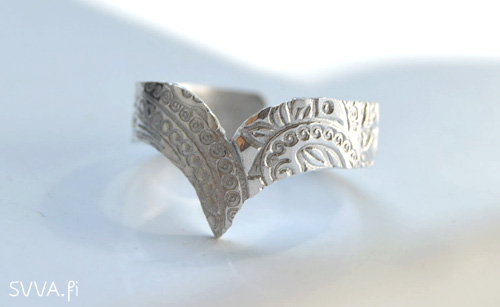
Love the result, will make more of this ring!
Then, I had little odd bits of clay left.
What to do with these bits, some of them were already two days old and rather dry? I collected all pieces and kneaded them into one lump. I rehydrated it, rolled, folded, rolled, folded under a piece of plastic until the clay felt perfect again. As I didn’t have any plan, I just made a thin snake about 2.5 mm diameter out of it, cut two parts of about 8mm long from the snake itself and attached these to both ends with left over ACS 950 paste on my little water tray.
I was curious, so I fired this piece from room temperature to 500°C then held for 30 minutes and then ramped up to 900°C and held for 1 hour then let it cool off to 200°C before taking it out.
Below, you can see the comparison of the clay before and after firing. The fired piece was just as the dry piece, but smaller.
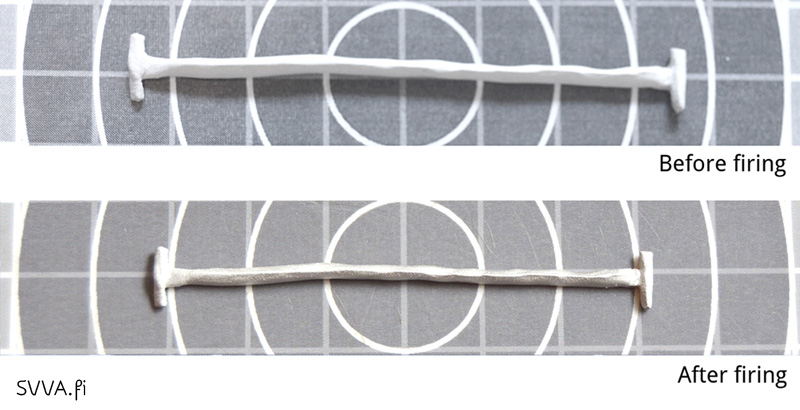 Here, the ACS 950 shrunk from 7.2mm long to 6.4mm, about 11%
Now, the interesting moment, could I turn this piece into a ring?
I bent it over a ring mandrel gently using fingers, and it worked perfectly! No cracks, no breakage.
Then, I got a bit more adventurous and wanted to hammer this ring to change the look of the surface.
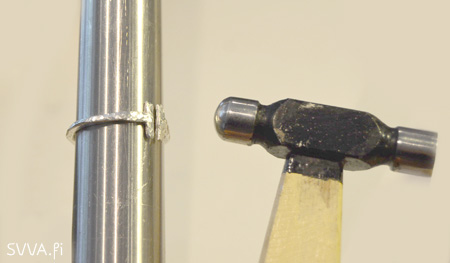 I then hammered the ring to texturize it.
It was hard and solid to hammer and stood very well. However, when I intentionally wanted to flatten the ends, one end came off. I could see it broke exactly on the seam. Before firing, to join the parts, I had only used a little leftover diluted ACS 950 paste.
Well, this was a great opportunity to try fixing a piece with regular ACS paste. I joined the parts with regular ACS paste, fired it at 800°C for 5 minutes, cooled off, then did another round of reinforcing using the paste and refired. The ring is fixed now. However, I didn’t hammer it further. I polished it using steel brushes, burnishers and tumbled it.
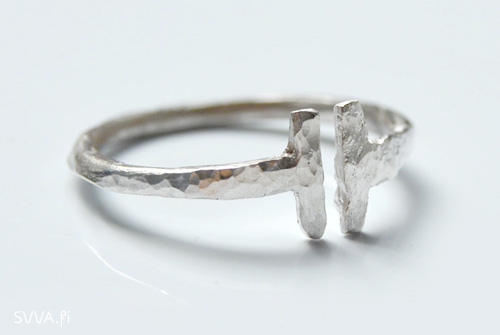
The ring after texturing with a hammer.
My conclusion: I have a new toy to play with :)
ACS 950, apart from the firing schedule, works just like regular Art Clay Silver. I’m definitely entering a new ‘playground’ with this clay and look forward to creating new designs.
My notes on working with ACS 950:
- Work as with regular ACS. Because ACS 950 is stronger, this doesn’t mean cracks could be neglected :)
- For designs which will be bent, hammered, etc., pay attention to joining points and seams
- For joining pieces, filling gaps, etc., make sure the paste consistency (either ACS or ACS 950) is good
- Calculate shrinkage about 12%
Regular ACS works beautifully, and now I can explore more on thinner, more open and delicate designs with ACS 950. ACS 950 is a wonderful addition to the Art Clay family! This new clay is available starting September 1st 2016. I got mine from Hopeasavi.fi, but it will be available from any local Art Clay Distributors.
I hope you enjoy my post :) Leave me a message below if you have comments or questions.
Interested in other jewelry techniques I do at my studio?
Take a look at my previous blog posts about Silver Quilling & New Mokume Gane
Stay in touch, sign up for my newsletter if you’d like to get updates from me:
Meira
Really interesting to read about your experience with new ACS 950! I’m definitely going to try it as well! I’d love to try soldering with it also. Looking forward to meet you and talk more about this! :)
SVVA
Thank you, Meira :) I’m sure you’ll love this clay! Look forward to hearing about your experiments, I’d like to know about the soldering too. It will be an interesting meet up, as usual ;)